How to design an app using a screenshot (in 5 easy steps with Uizard)
There’s no denying it, the emergence of groundbreaking AI tech is transforming the way many of us view even the most basic of tasks. Where before creating content for social media or blog posts, or even just replying to emails, could be arduous tasks, tools such as ChatGPT are making our day-to-day easier and more stress-free than ever before – and the world of design is no exception.
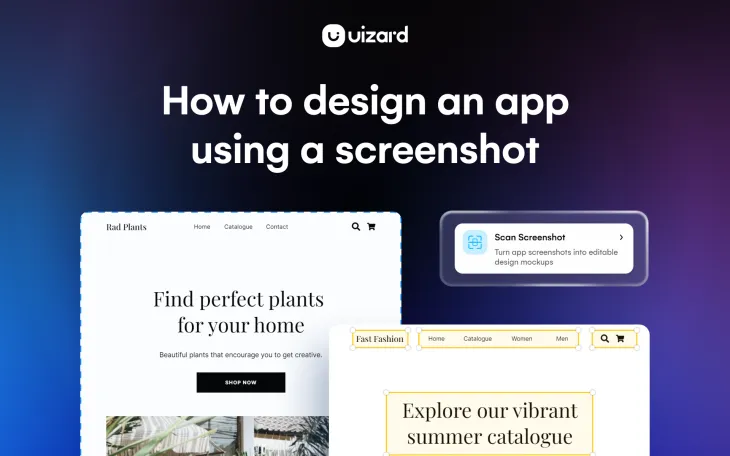
Not only is AI UI design software democratizing the design space, but it is also empowering users to design at speed and iterate on concepts faster than was previously thought possible. Take Uizard’s screenshot converter, for example… with Screenshot Scanner, you can upload screenshots and transform them into customizable mockups in seconds.
In a nutshell, if you’ve got an idea for an app and you are struggling with blank page syndrome; if you’ve been inspired by another app and want to use it as a launch pad for your idea; if you don’t have a clue about the world of UX design and want to shortcut all the research on button placement, layout etc. then Uizard's screenshot converter is going to be a true game changer for you.
Want to know more? Let’s take a look at how to kickstart an app design project from a screenshot alone. Spoiler: once you know the basics of how to use Uizard Screenshot, the possibilities are endless!
Skip to section:
Design an app from a screenshot in 5 easy steps
- Sign up to Uizard and create a new project
- Upload your screenshot to Uizard
- Update and customize your screenshot
- Upload more screenshots and connect your screens
- Share your app mockup for feedback and iteration
Generate and add a new screen using a screenshot
Design an app from a screenshot in 5 easy steps
Ready to up your design game? Here is how to design an app using a screenshot in 5 easy steps. If you want to find out more about the technical side of screenshot conversion you can check out our technical breakdown of Screenshot Scanner, otherwise, let’s dive right in.
- Sign up to Uizard and create a new project
- Upload your screenshot to Uizard
- Update and customize the screenshot to suit your concept
- Upload more screenshots and connect your screens
- Share your app mockup for feedback and iteration
Sign up to Uizard and create a new project
First things first, as with all Uizard’s AI design features, you need to first sign up to try Screenshot Scanner. With a Uizard free account, you can scan in 10 screenshots per month and transform them into customizable designs, meaning if you are working on a small project or you just want to try the feature, you can do so free of charge! With Uizard Pro, for just $12 a month, you can scan in up to 500 screens and access Uizard’s other AI design features such as Uizard Autodesigner (text to mockup) – this is the perfect choice for unlocking your full design potential.
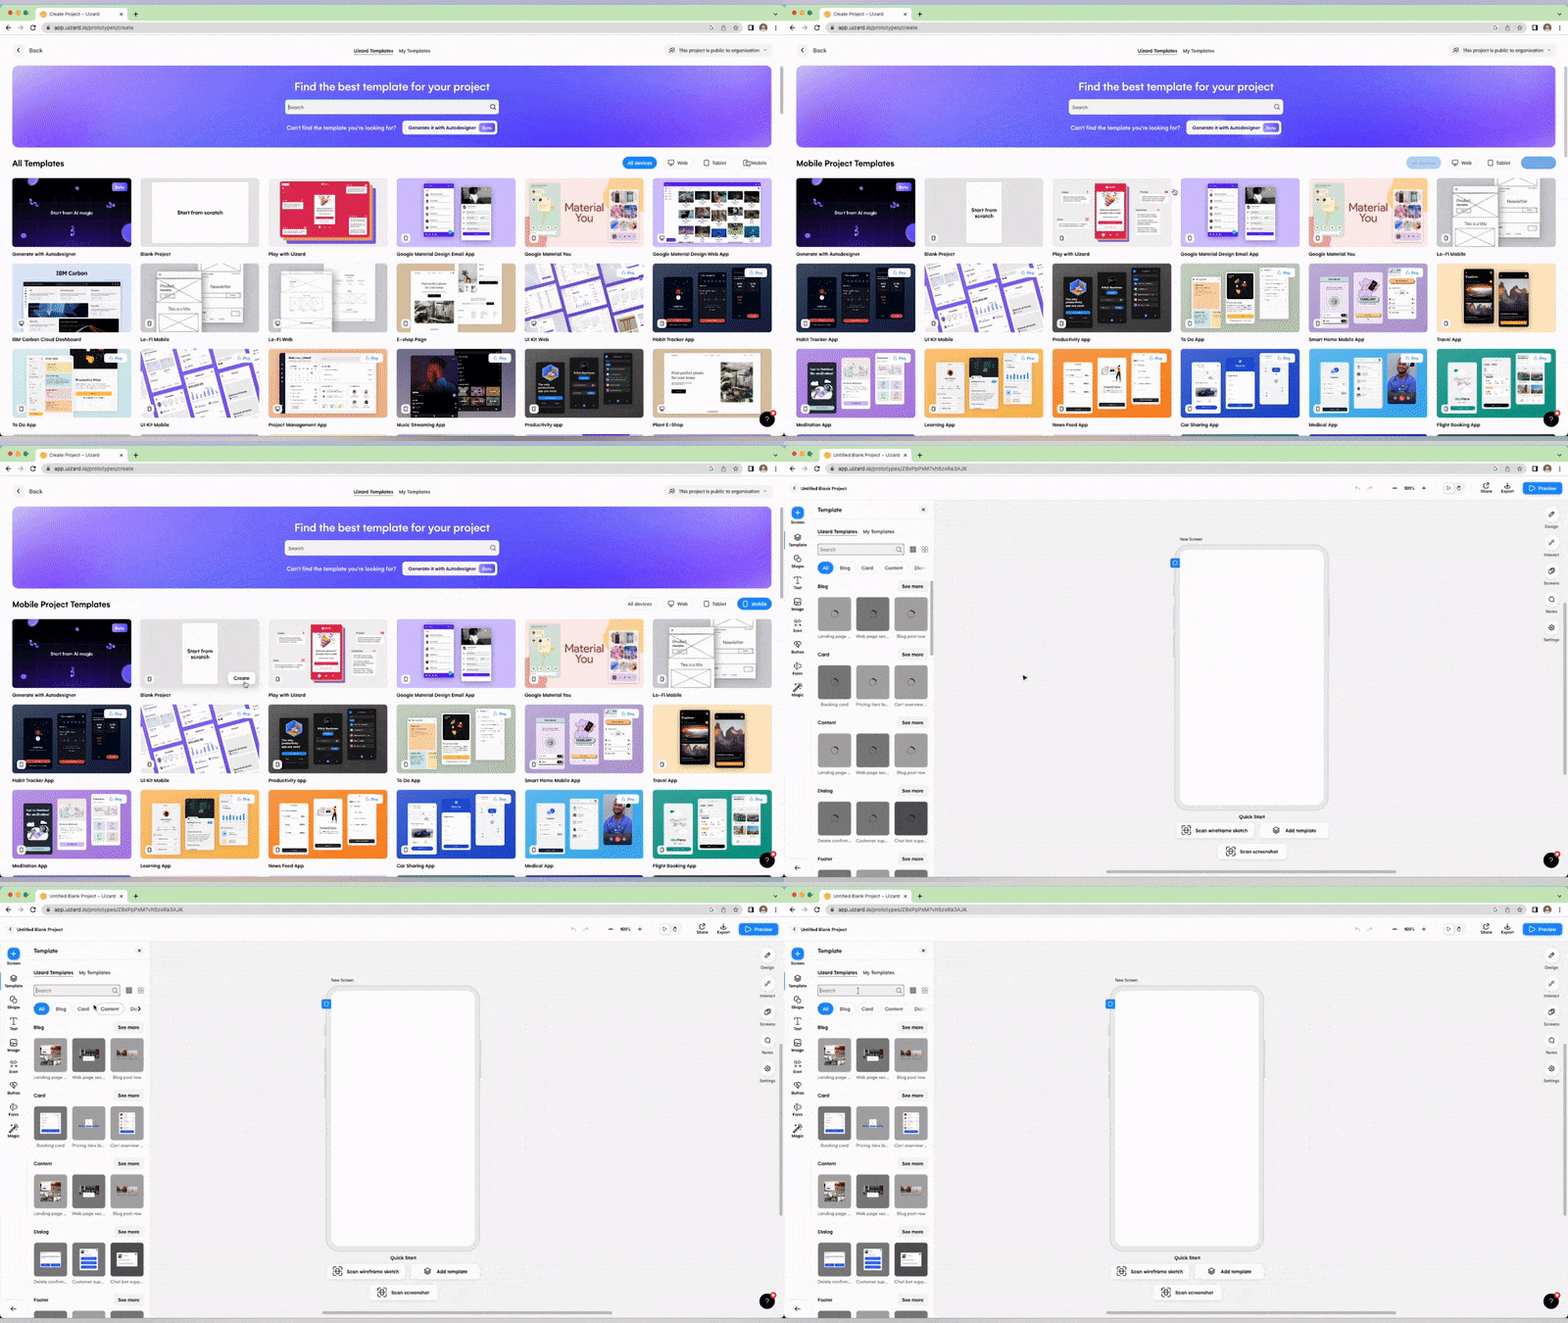
Once you've signed into the platform and completed your onboarding tasks, navigate to the project creation interface. Here, you can either create a new blank project, which will give you the option to upload a screenshot, or start directly from a screenshot via the project dashboard. And this is where your app design concept will take shape.
Upload your screenshot to Uizard
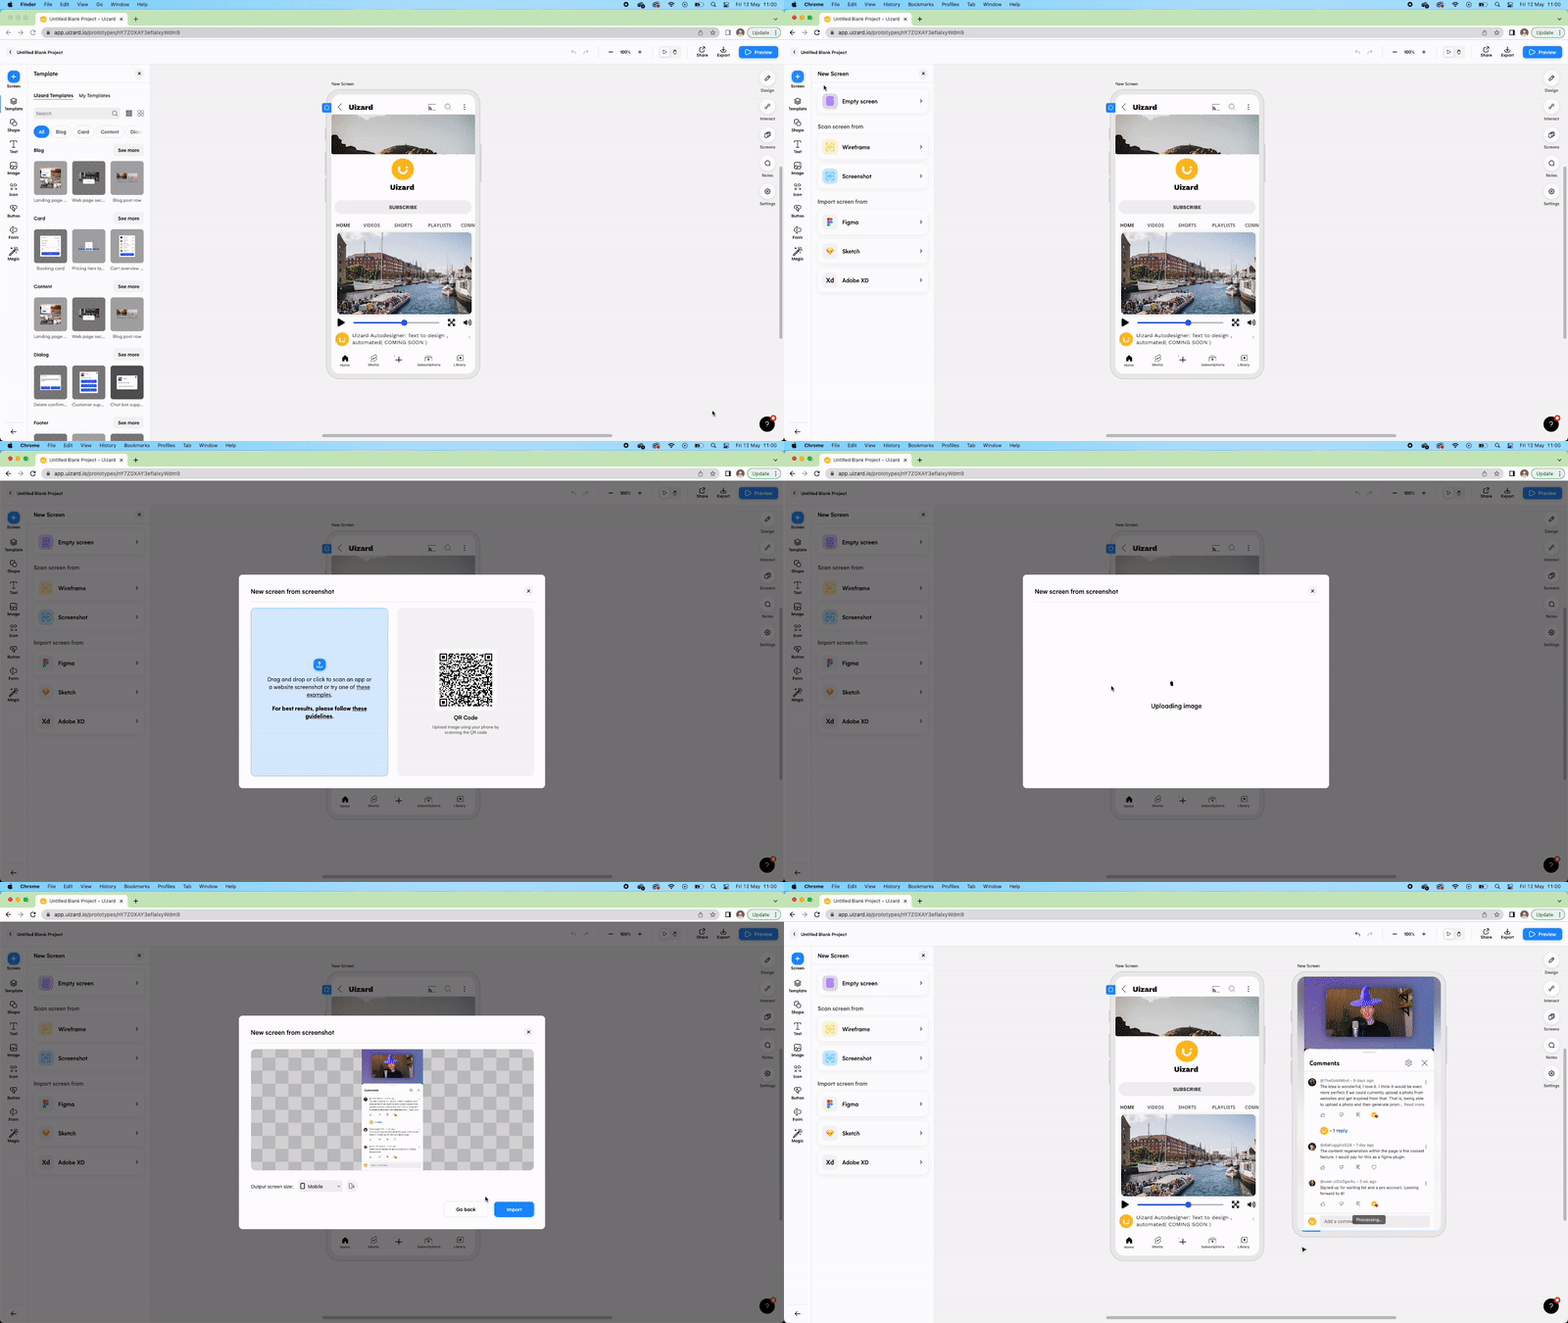
Once you've opened up a new app design project, it's now time to upload a screenshot and transform it into an customizable design. Uploading your screenshot to Uizard is super easy, and there are a couple of ways you can go about doing it.
Method 1: Use a QR code
To upload a screenshot directly from your phone, once you've clicked the screenshot feature button, all you need to do is scan the QR code with your phone camera. From here, you can simply take a screenshot of an app on your handheld device, click the 'Select from files' option, and grab the screenshot from the image library.
Method 2: Drag and drop your screenshot into Uizard
Alternatively, you can upload a screenshot directly from your computer. Simply select the file you want to import from your local storage and drag it into Uizard to kick off the upload. Screenshot Scanner works great for all device types, so be sure to check the output resolution on the left-hand side of the upload interface before clicking 'import'.
Update and customize your screenshot
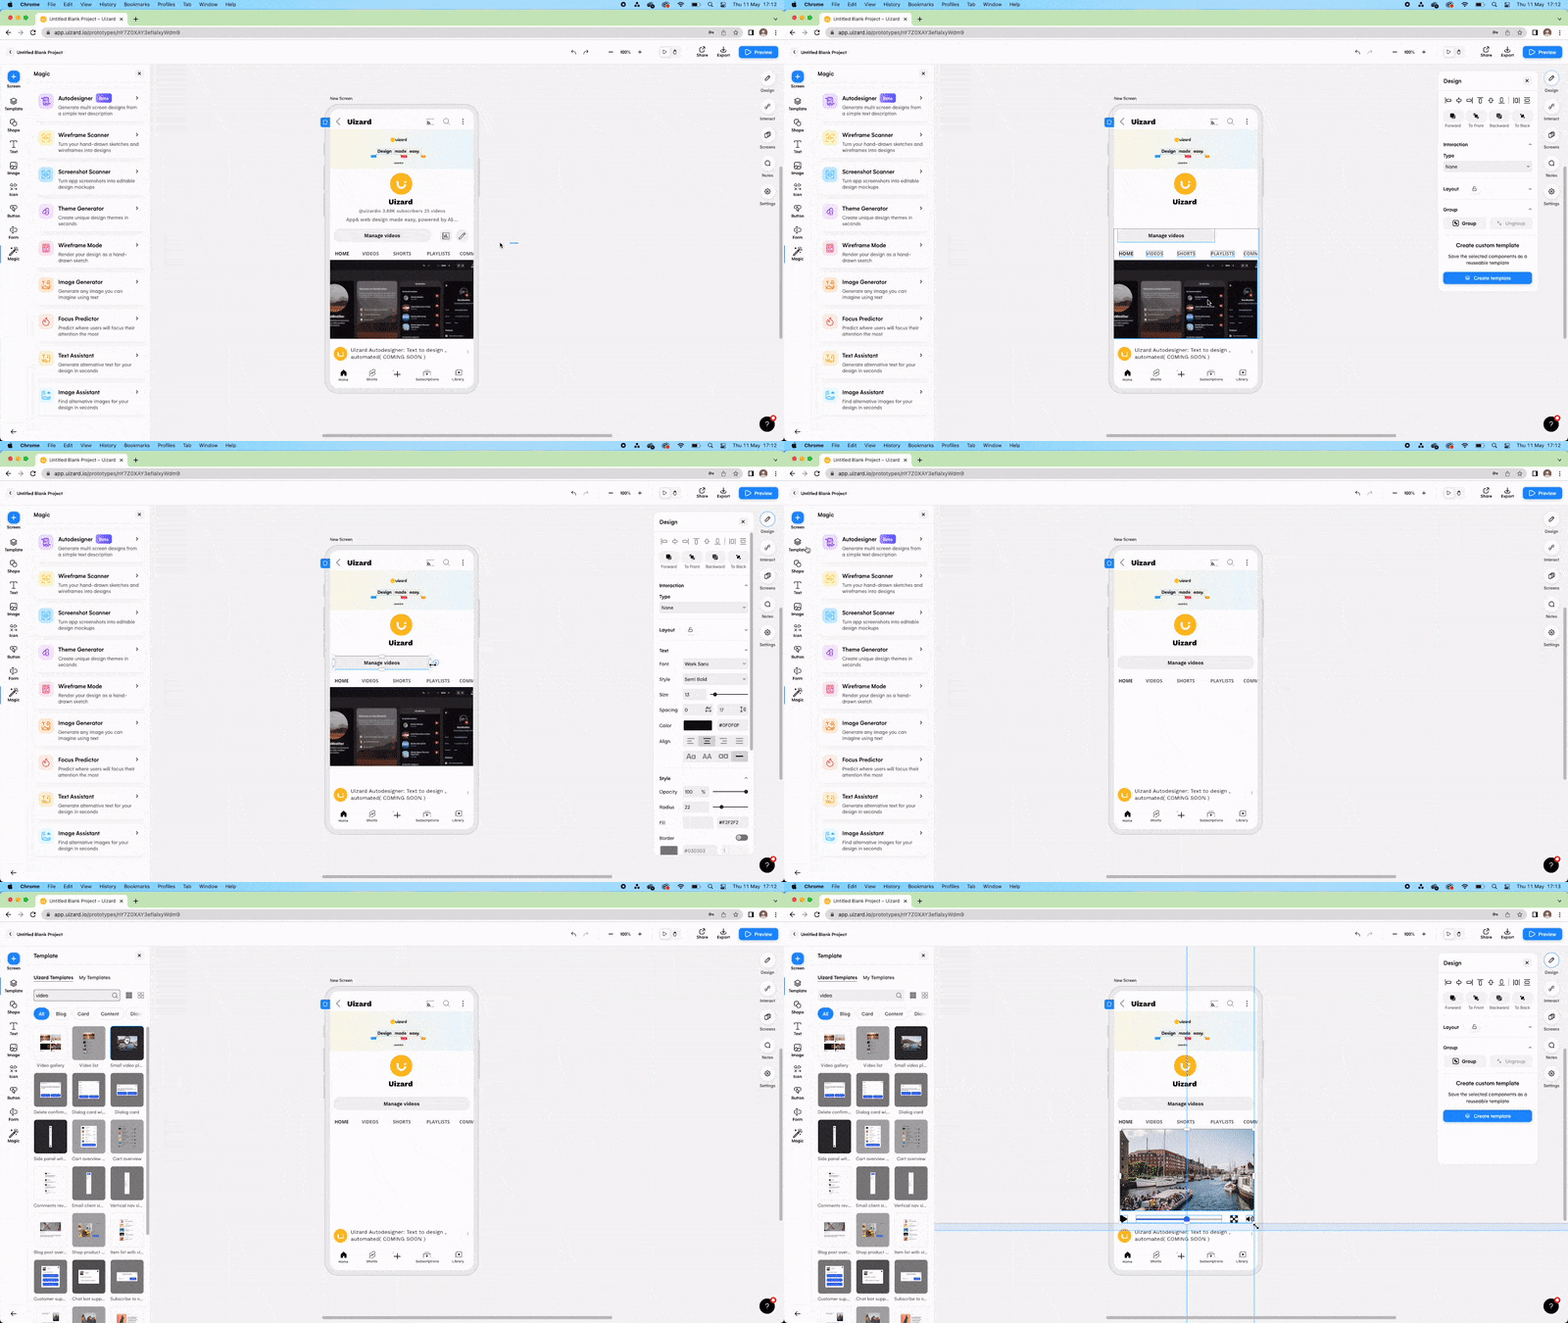
Once you've clicked 'Upload', this is where the fun begins. Watch as Uizard transforms your screenshot into a customizable design where you can update the images, text, buttons, components, and even the overall layout of the screen.
The possibilities and potential are limitless here. You can add in your own branding and update text and images to align with your vision; essentially, you can take any app, website, or webpage you find out in the wild and adapt it to suit your own project!
Upload more screenshots and connect your screens
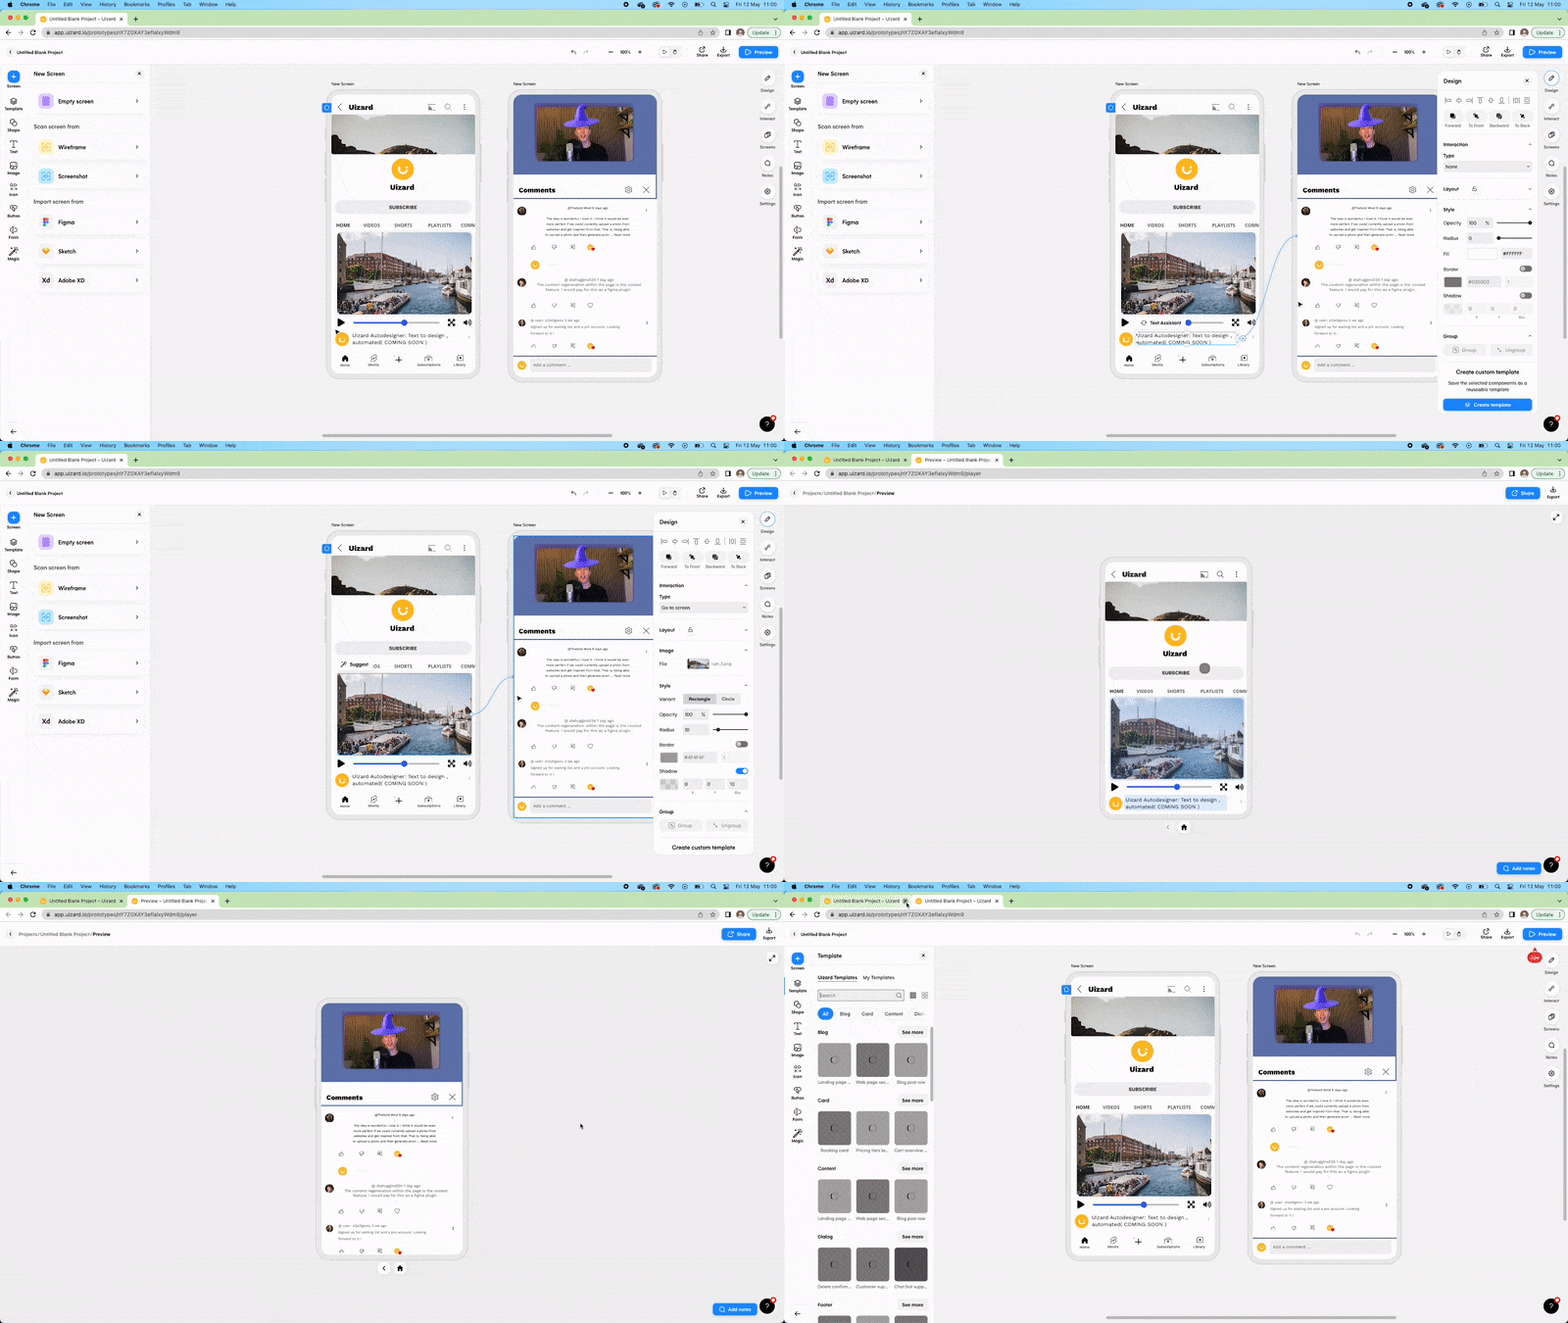
The Screenshot Scanner journey doesn't end with a mockup of a single screen for your app design, use the tool wisely and you can spin out an entire prototype in next to no time. Once you're happy with your initial screen, simply scan in the other screenshots you want to incorporate into your project.
The beauty here is you can use screens from your existing app and replicate how it looks with a design tool, you can upload all the core screens of your favorite app, or you can even import various screens from several different apps to create something truly special. Uizard can even support you to update the UI theme of all the screens in your project using Theme Generator!
Once you're happy with your design, you can now add clickable links to the project to transform your mid-fi mockup into a clickable prototype.
Share your app mockup for feedback and iteration
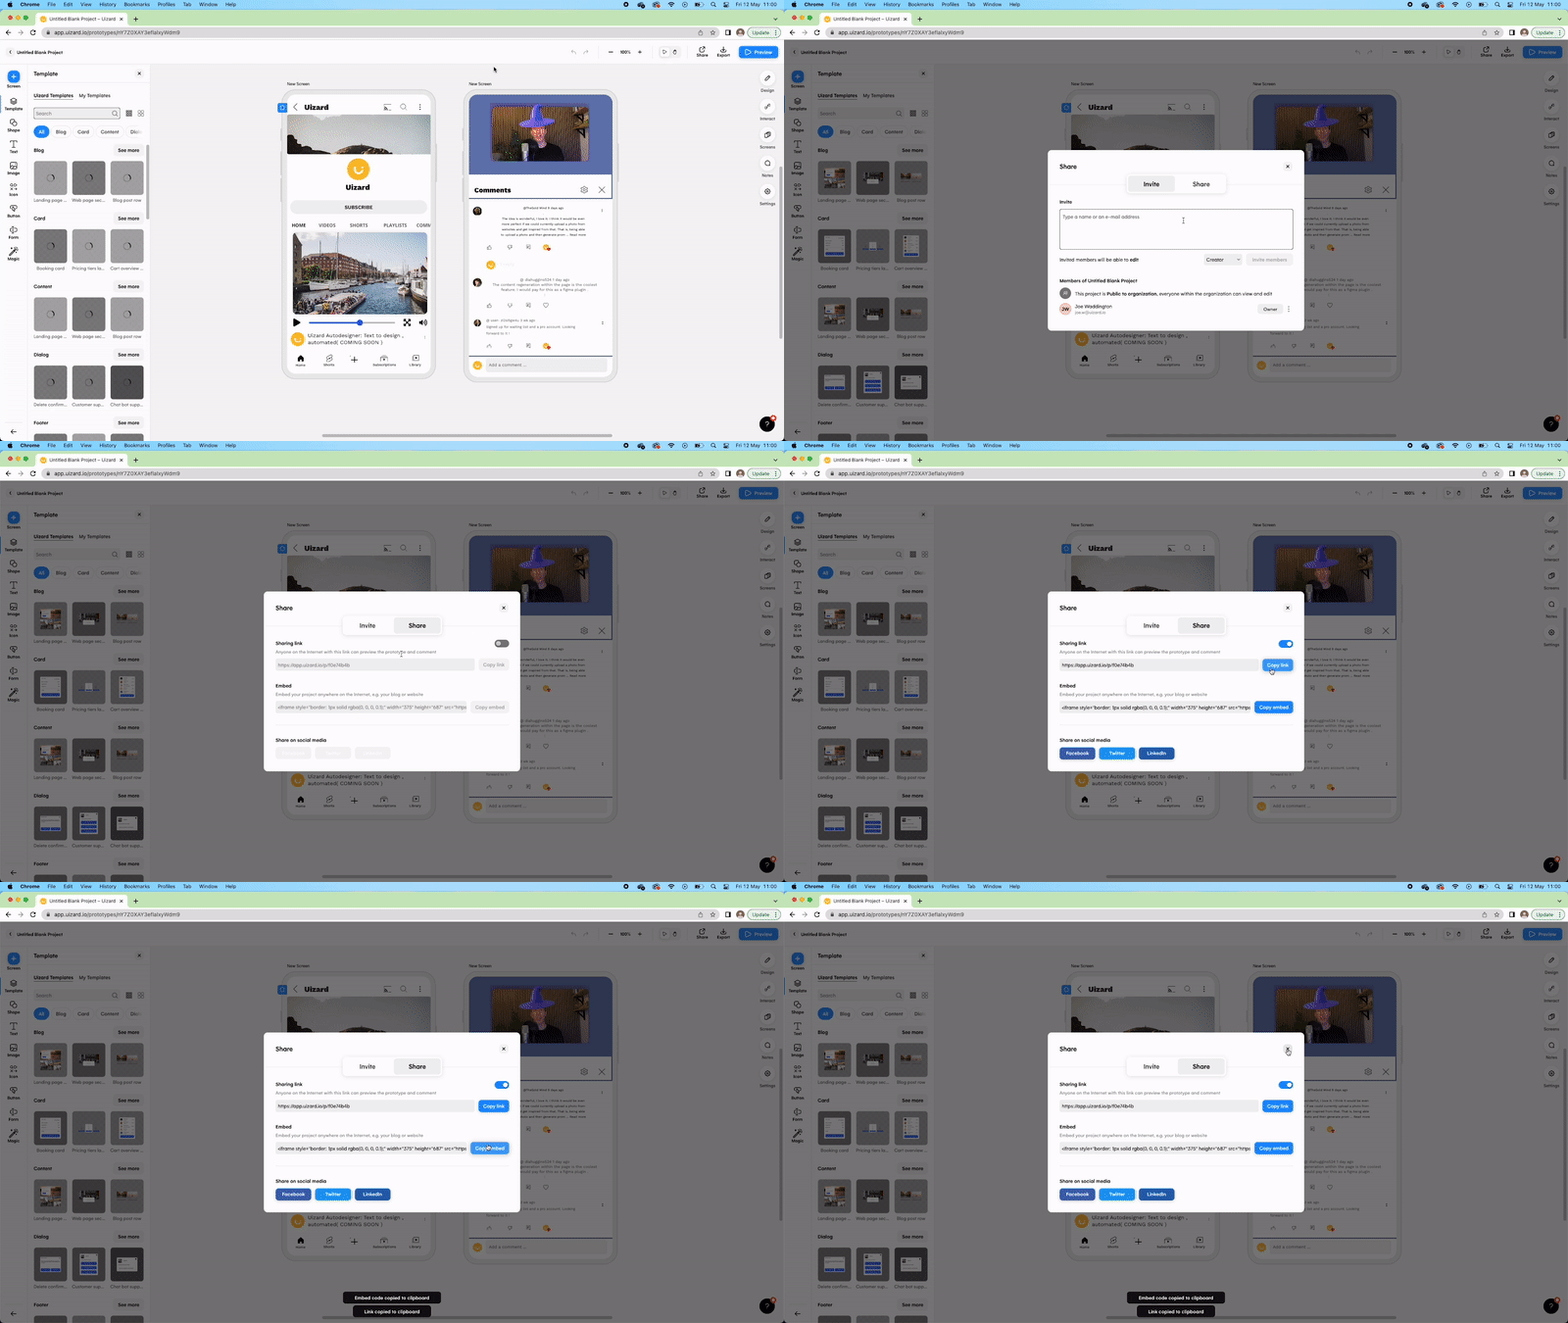
Sharing your design for feedback is quick and easy. Simply click the 'Share button in the top right-hand corner of the Uizard app. From here, you can invite teammates to join your project and leave feedback, or share a preview link of your prototype for external stakeholders to explore and comment on.
And just like that, you’ve created a stunning app mockup in next to no time with the magical power of AI! You're not limited to mobile app design either. You can use screenshot converter for website or tablet app design projects as well, the possibilities really are endless.
Generate and add a new screen using a screenshot
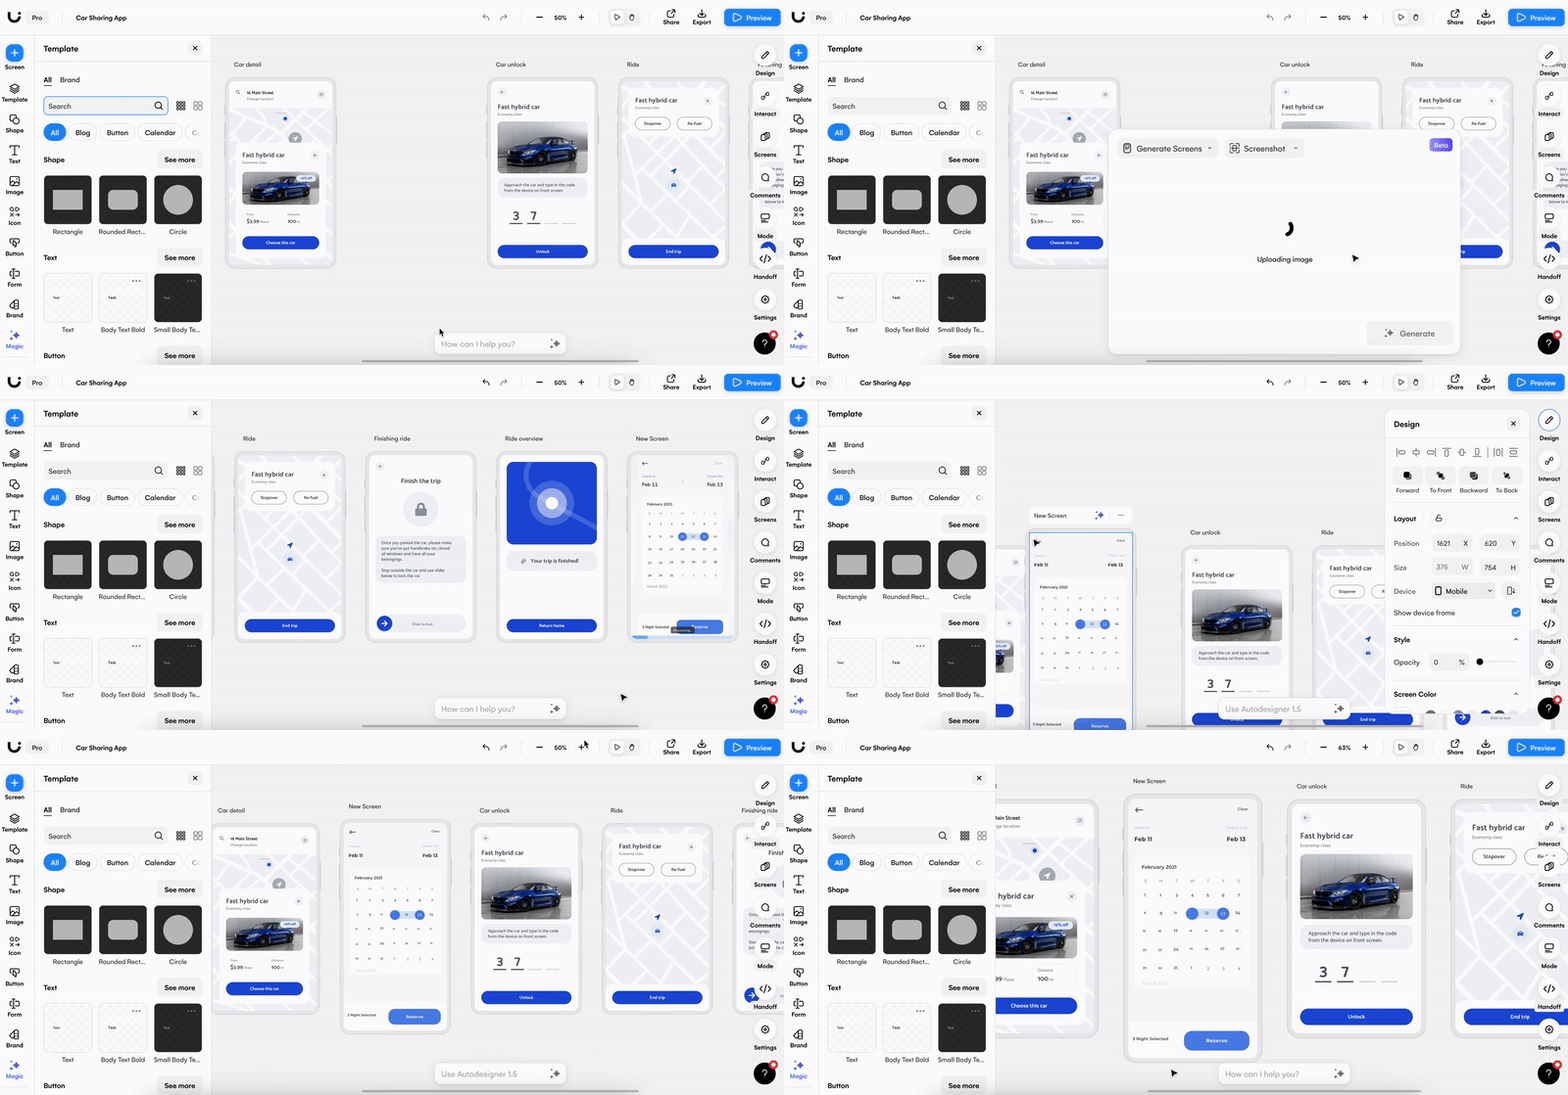
With our new Autodesigner widget, located at the bottom of the editor, you now have the option to generate a new screen to add to an existing design. And you can do so by uploading a screenshot. This is a great alternative to starting a project from a screenshot, as it allows you to progress your design further using external inspiration.
To get started, click on the widget and use the dropdown to select ‘Generate Screens’. From here, pick the ‘Screenshot’ option and upload the design image of your choice. Using the drag-and-drop editor you can then edit it to your liking.
Screenshot Scanner is making UI design faster and more accessible than ever before, and the best part is that the feature is completely free to try! Sign up to Uizard today and try scanning in screenshots of your favorite apps and websites today.
